Photo chemistry manufacturer and supplier Tetenal Europe GmbH is reportedly set to close up shop after a prolonged search for new investors failed to secure its future. Under voluntary insolvency protection since last October, the German-based firm is set to complete its current production run and close its doors at the end of the financial year on April 1st, according to a report on the German imaging + foto contact website.
The closure could have serious consequences for the film processing industry as Tetenal manufactures chemicals under its own name as well as for many third party brands across Europe. It is also the main supplier of materials for the Kodak Express chain across the continent and the only supplier of consumables and service for Konica Minolta minilabs. It is also the distributor of Kodak Aerial Imaging Films and Chemicals in Europe, Africa and the Middle East.
The company can trace its roots back to 1847 when drug wholesaler Theodor Teichgraber started distributing chemicals for wet collodion plates. Since then it has moved into the production of film chemistry for professional, high street and home users. It also has branched in to other chemical areas, such as agriculture, but has also become an important distributor for Epson, Eizo, Kodak and a range of inkjet and dye sub media.
The company had a change of management in April 2017 when Matthias Hübener stepped down from the day-to-day running of the firm for make way for Daniel Middendorf, who was still MD until this month. Hübener, who remains the business’ main shareholder, managed Tetenal for 24 years from 1993, taking over from his father Fritz who had become CEO and the main shareholder in 1960.
It isn’t clear at this stage how the closure of the Europe HQ will impact subsidiary companies in France, Poland and the UK. For more information see the Tetenal Europe GmbH website.
At the start of 2018, Neil Burnell set out to win Amateur Photographer of the Year (APOY). By Christmas, he’d done it. He tells Ailsa McWhinnie how he went about tackling the eight-round competitionAt the start of 2018, Neil Burnell set out to win APOY. By Christmas, he’d done it. He tells Ailsa Mc
Tips of things to photograph: 1. Work the scene Don’t just shoot 1-2 photos. Shoot lots of photos with your subject, and treat it like a dance. 2. Shoot your food The good thing about shooting your food is this: When you shoot your food, you associate those meals with certain memories with certain people. […]
5 Must-Know Photoshop Tips and Tricks for Photographers In this article, I’m going to show you five of my favorite Photoshop tips and tricks for Photographers. These are techniques that most people probably don’t know, but are very useful and they can help you speed up your workflow.
#1 – OPEN THE SAME IMAGE IN TWO WINDOWS In Photoshop, you can open the same image in two windows and set them side-by-side to work on both details and the overall image at the same time.
To open the same document in two windows, go to Window > Arrange, “New Window for [Name of Document].”
These are not two separate documents. They are the same document, and any adjustments that you make to one will reflect instantly on the other.
Then go to Window > Arrange > Two up Vertical to put the two tabs side-by-side. You can then Zoom into one window and zoom out on the other.
If you have two monitors, then you can place a zoomed in version in one monitor and a zoomed-out version on the other.
This technique comes in very handy when working with large documents. I once worked on a huge composite that had over 1,500 layers. By using this technique I saved a lot of time by not having to zoom in and out of an image after I made a small adjustment to details.
# 2 – NUDGE, SCALE, AND ROTATE CLONE TOOL SOURCE To speed up your workflow when using the Clone Stamp Tool, remember that you can use keyboard shortcuts to nudge, scale, or rotate the sample source to better match the size and orientation of the cloning destination.
First, set the sample point by holding Opt/Alt and clicking on an area to sample from. You will then see an overlay of your sample source.
You can then try these keyboard shortcuts to adjust the sample source.
To nudge the Clone Source, you can hold Opt/Alt and tap on the Arrow keys (left, right, up and down).
To rotate the Clone Source Hold Alt (Mac: Option) Shift < or >.
To scale the Clone Source Hold Alt (Mac: Option) Shift or .
If you cannot remember these keyboard shortcuts, you could instead use the Clone Source panel (Window > Clone Source) to make these adjustments to the sample source.
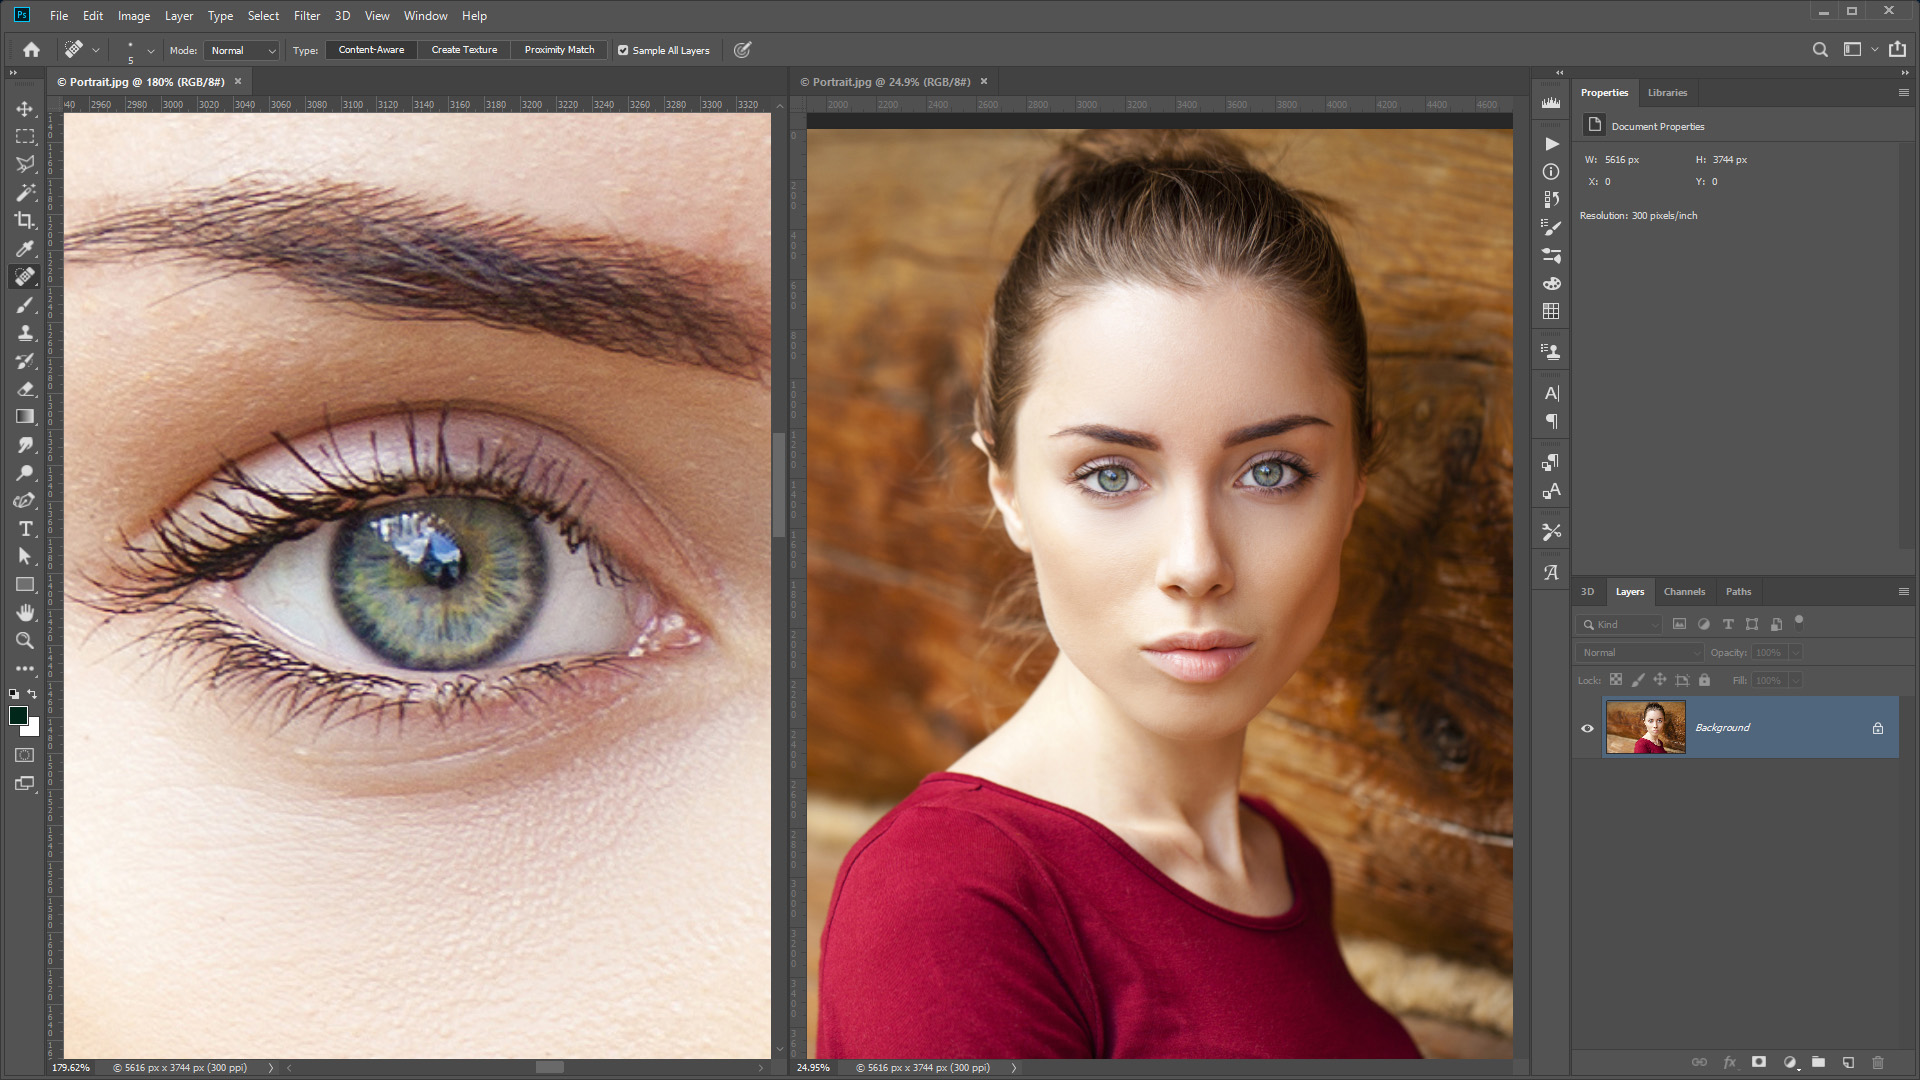
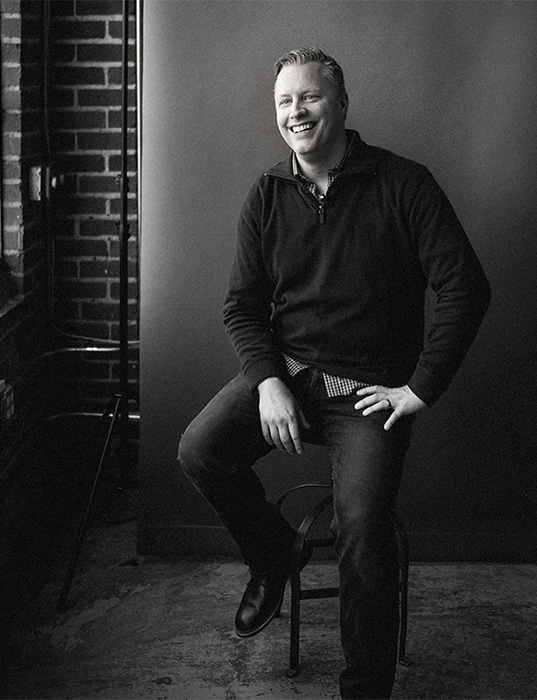
#3 – SPOT HEALING BRUSH TOOL MODES One way to quickly remove wrinkles, blemishes, and other distractions from portraits is to use the Spot Healing Brush Tool. But an often-overlooked option is the Modes dropdown which add a lot more power to this tool.
Under the Options bar, the Spot Healing Brush Tool has Blending Modes that you can use as you paint to better target the pixels that you want to remove.
To select the right mode, you first must look at the blemish, wrinkle, or distraction that you want to remove. Then ask yourself, is the distraction darker than the skin tone or is it lighter than the skin tone?
In the example for this article, the blemishes are darker than the skin tone. That means that you want to “lighten” those blemishes to reduce their intensity.
From the Modes dropdown select Lighten.
Then start painting with a small brush and small strokes over the blemishes and wrinkles to remove them. But notice how you will not lose essential detail in the highlights. The Spot Healing Brush Tool will only target dark pixels which are the pixels that you want to remove.
In the example below, you will see how the fine white hairs remained on the side of his head while the darker blemishes were removed.
If your blemish or distraction is lighter than the skin tone, then select Darken from the Mode drop-down menu, and paint away.
#3 – LOAD LUMINOSITY AS A SELECTION In Photoshop you can use the luminosity of an image (the bright pixels) as selections. The easiest way to select the bright pixels of a photo is by pressing Cmd Opt 2/Ctrl Alt 2.
If you cannot remember the keyboard shortcut, you can also load luminosity as a selection by holding Cmd/Ctrl and clicking on the RGB thumbnail in the Channels panel.
With a selection active, you can create an Adjustment which will target the bright pixels.
If you would like to target the dark pixels instead, you can “Invert” the selection. To do so, Select the Layer Mask, and click on Invert in the Properties panel. Alternatively, you can press Cmd I, Ctrl I when the layer mask is selected to Invert.
Now if you make an adjustment, the dark pixels will be affected instead of the bright ones.
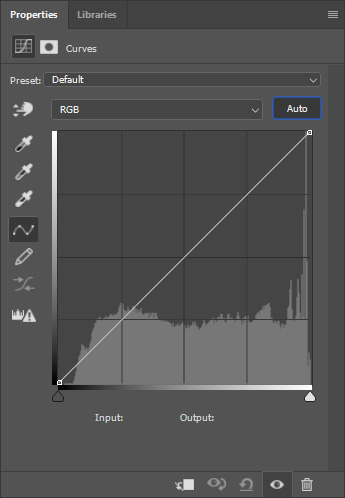
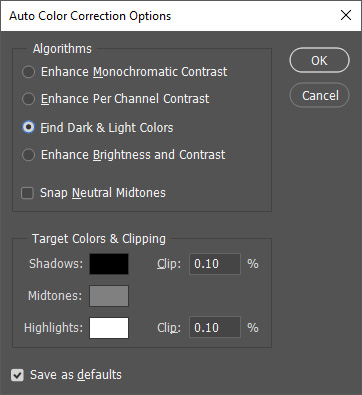
#5 – CURVES AUTO COLOR CORRECTION Did you know that you can color correct a photo with just one click?
With the Auto Color Correction Algorithms inside of the Curves (and Levels) Adjustment Layer, you can automate color correction in Photoshop.
This essential technique will let Photoshop do all the hard work, and it will automatically adjust each channel to color correct the image.
You can apply the Auto Tone non-destructively by creating a Levels or Curves adjustment layer, then click the “Auto” button in the Properties panel.
But the default algorithm is not usually the best one. To change the algorithm hold Opt/Alt and click on the Auto button.
Then, from the Auto Color Correction options you can select one of 4 algorithms to color correct your image. In Photoshop CS6 and newer, the default algorithm is Enhance Brightness & Contrast. In older versions of Photoshop, the default is Enhance Per Channel Contrast.
You can then click on the different algorithms and see how they affect your image. In most cases, I found that “Find Dark & Light Colors” give you the best results.
You can click on the “Save as defaults” checkbox so that this algorithm is applied when you click on the Auto button.
After you apply the color adjustment, you will see how the image will instantly be color corrected.
For more information on how this technique works and what to do when the auto color correction doesn’t work, you can check out my YouTube video on The Curves Auto Color Correction Options.
Reviewing some photos from last year, some tips: 1. Dynamic hand gestures Hand gestures to make triangles and other interesting compositions. Note the negative space to the left, the same direction Cindy is looking: 2. Tilt your camera + have leading lines Shoot photos while walking, and
Get up close and personal for great shots... Our experts suggest getting creative with compositions and backdrops and keeping a close eye on the details while watching out for distractionsOur experts suggest getting creative with compositions and backdrops and keeping a close eye on the details
Adorama has announced the availability of a new studio flash head from its own Flashpoint range. Designed for photographers who don’t want TTL control, the XPLOR 600 Pro HSS offers 600WS of power with wireless triggering.
With the standard reflector fitted the head has a guide number of 87m / 285ft @ ISO 100. Users can expect 360 full power bursts from a single charge of the head’s 2.6Ah lithium ion battery pack. An optional AC adapter is available, but even when powered by the battery recycle-times are between 0.01 and 0.9 seconds. The head uses a 2.4GHz wireless system making the XPLOR 600 Pro HHS compatible with the Godox X radio triggers, which are available for all the main camera brands.
Wireless control works across 32 channels and x-compatible flashes can be separated into five groups. Two optical slave modes are offered, with all settings dealt with on the large side-mounted LCD panel. The HSS in the name refers to the head’s ability to sync with shutter speeds of up to 1/8000sec, and the output can be varied across 9 stops to 1/256th in 25 steps. A battery and charger are included in the kit, along with a standard reflector in the Bowens S mount.
The head is the non-TTL version of the XPLOR 600 Pro TTL, and is priced $749 against the $899 charged for the TTL model. It is also a version of the Godox AD600 Pro head that has TTL. For more information see the Adorama website.
I was recently watching a tutorial on advanced product retouching in Photoshop, during which the instructor spent an astounding amount of time removing imperfections and isolating every element to its own layer. It was eye-opening, but not in the way I expected. During my career I’ve captured a client’s or art director’s vision on a two-dimensional plane with lighting, subject matter, resolution, and camera angle baked-in forever. This had me looking for another way to approach image and motion creation.
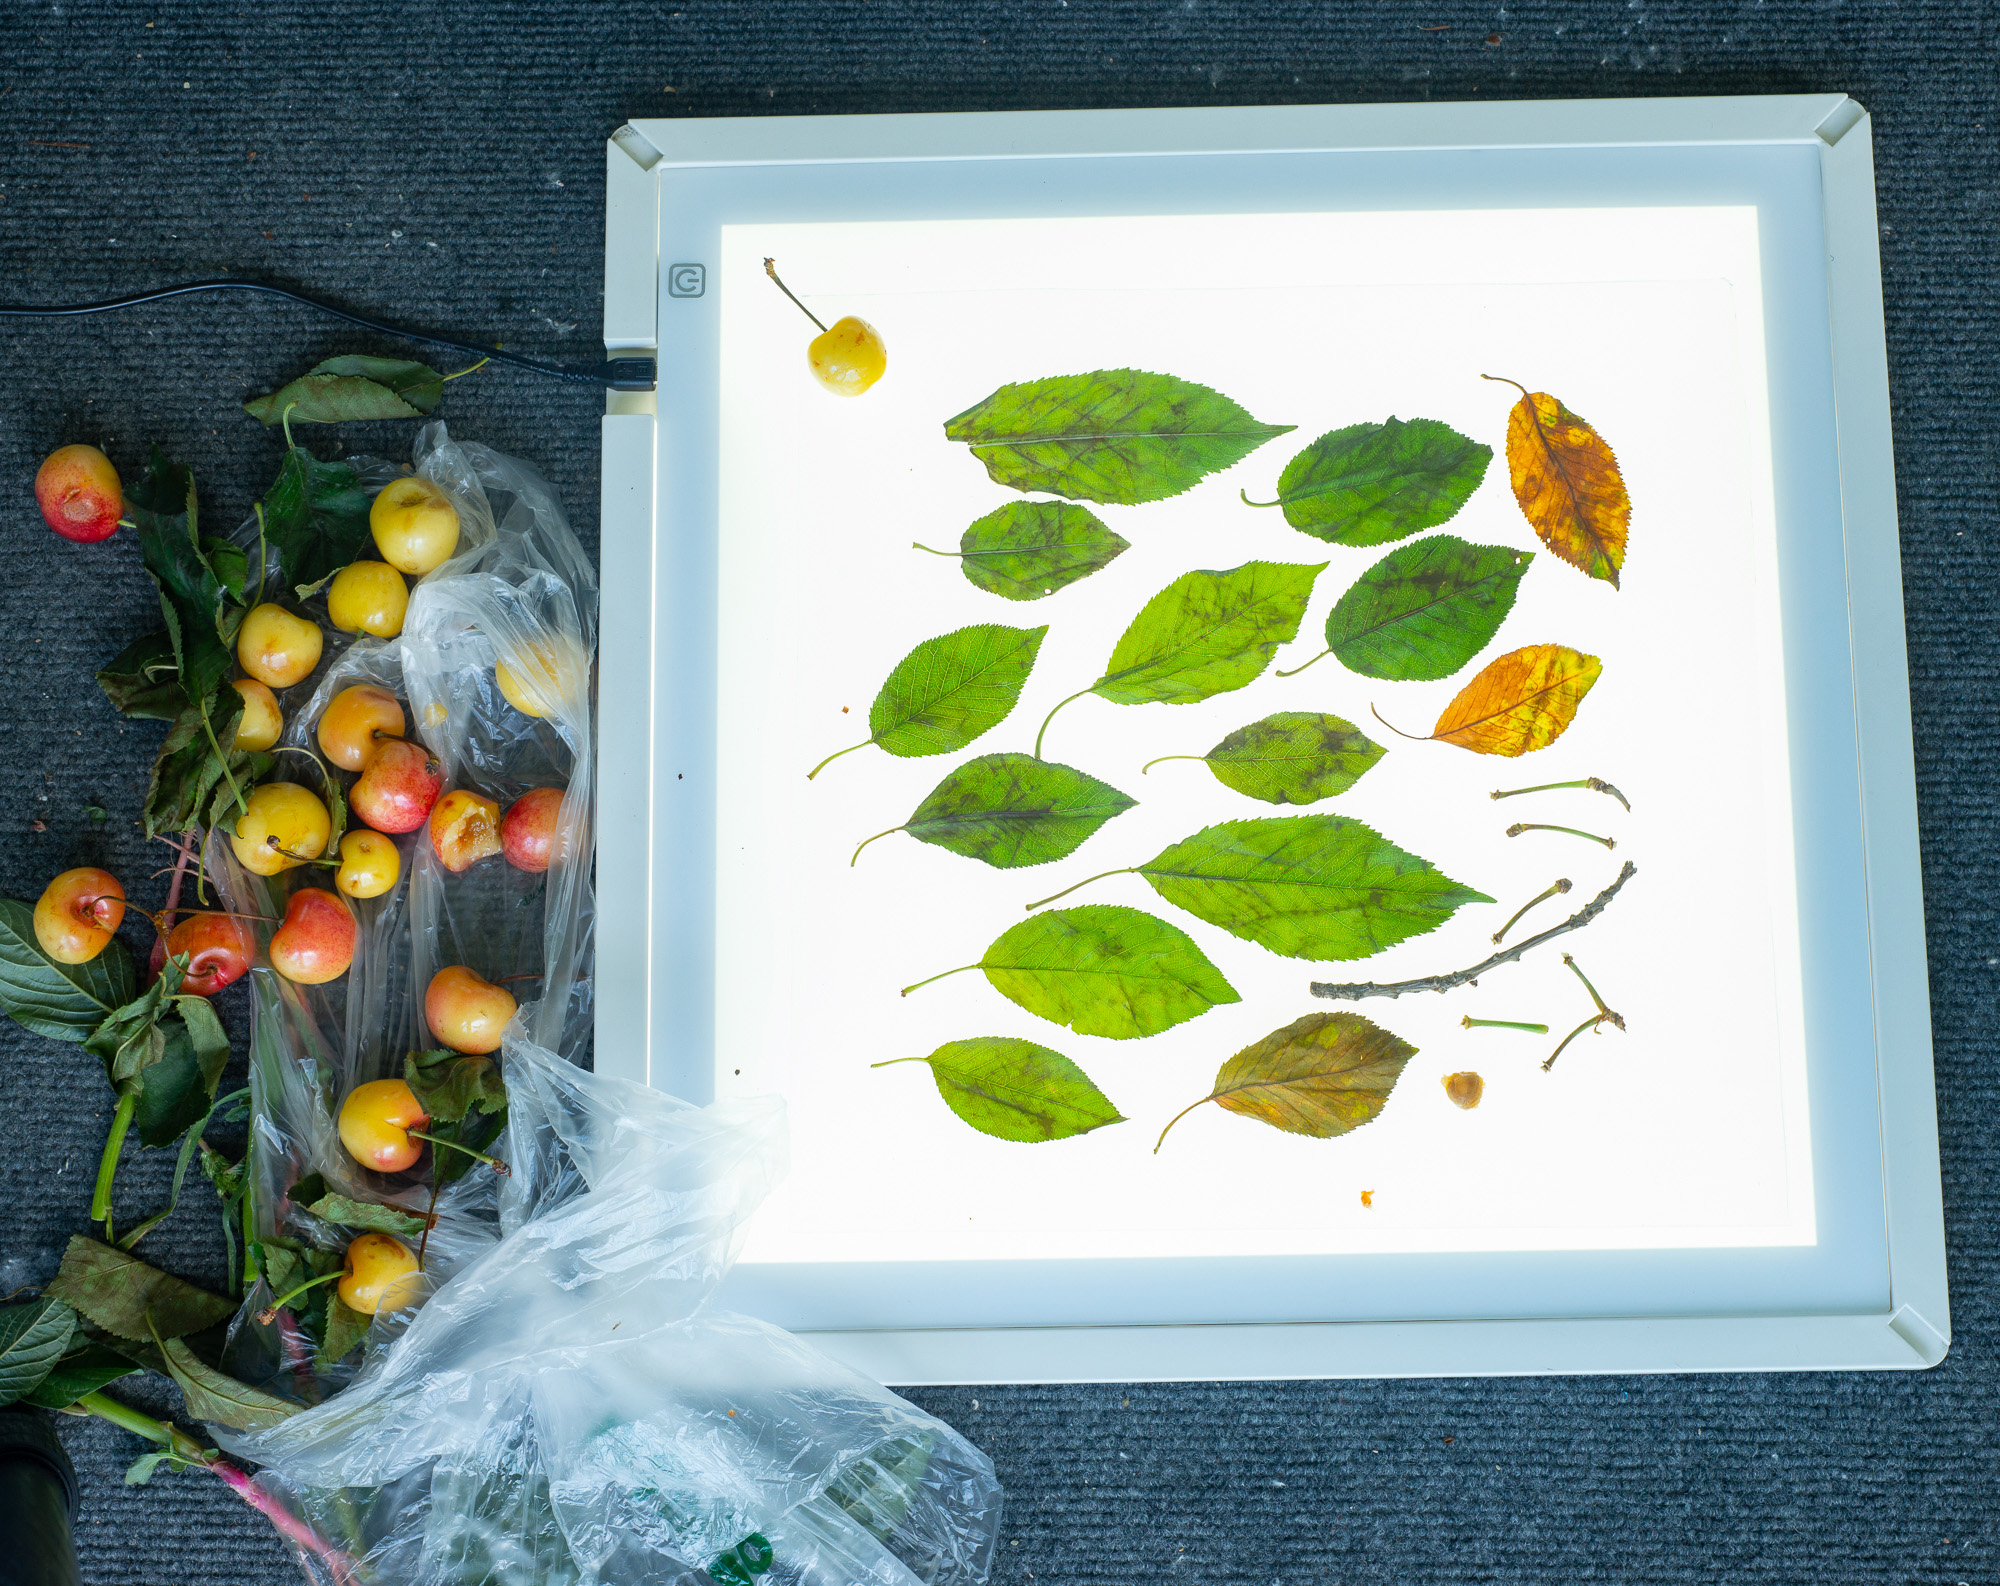
Here I’m on location capturing overhead shots of foliage to be used in SpeedTree to re-generate the plants in the 3D realm. I capture a naturally lit overhead shot as well as a back lit shot to tell the 3D program how the texture is to look when back-lit.
During a recent series of trips to New York, I found myself with quite a bit of downtime in the evenings which allowed me to dive headfirst into the world of 3D. 3D is nothing new, but as of late the software and hardware is advancing at lightning speed, and I noticed that it wasn’t being used in generating food imagery nearly as much as it should.
In order to use 3D in production as a food photographer, I needed to become adept at modeling, texture creation, photogrammetry, VFX, compositing, and sculpting. Not an easy task and as many know, but the learning never ends!
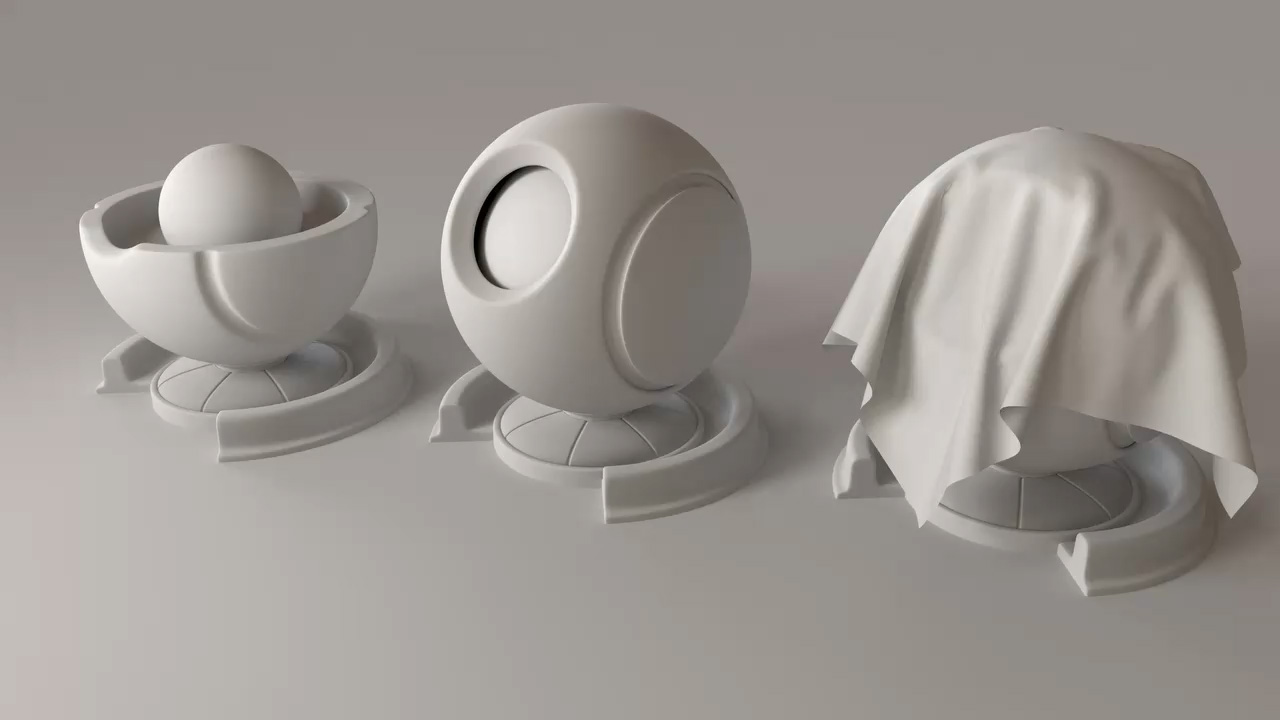
This entire scene was modeled, lit, and rendered in around 30 minutes. The scene still has that overly-slick 3D look so blending in grunge maps and other imperfections to the scene works wonders. This scene was lit with what’s known as an HDRI map with is essentially a spherical panorama of a location that is used as the lighting source.
For organic objects, nothing beats photogrammetry! To create this oyster asset, I shot the oyster on a Lazy Susan from every angle possible and stitched the images together in Reality Capture. The resulting 3D mesh is then cleaned up in Zbrush and the color texture is cleaned up in Photoshop.
My favorite breakthrough in 3D and one that doesn’t get nearly enough focus in 3D software development is VR. I currently use MODO for modeling, and they recently implemented a VR viewport allowing the user to physically enter the 3D space. This is important as I’m used to moving around a physical subject and my hope is eventually to be able to conduct a virtual photo shoot live within this realm.
What I love about 3D is that anything becomes possible and the food on set never goes bad!
The strength of 3D lies in the ability to create any photorealistic environment you want and change anything from lighting to export resolution forever.Learning 3D also makes you a better photographer. Photographers always tout their understanding of light, but it took me all of two minutes learning PBR material authoring to realize I didn’t know squat!
Rendering realistic objects is challenging and render times increase as the light complexity increases. I will often test techniques in isolation such as caustics and light bounce counts.
I use Redshift for nearly all of my rendering needs and I tend to render out EXR files which contain the various “passes” needed for post-production. This process separates depth, luminance, puzzle matte, roughness, albedo, emission, sub-surface scattering, and other passes so that each element can be manipulated separately in Photoshop or After Effects If the export is for motion.
Material authoring is addictive but time-consuming. There are many 3rd party sources that provide a variety of base materials such as these to get your started.
As much flexibility as 3D offers, every still image render ends up in Photoshop where the final creative touches are applied. Having a strong knowledge of Photoshop, lighting, camera operation, etc. gives photographers a strong starting point to learn 3D.
The more I progress in adding 3D to my wheelhouse, the more I realize that this hybrid approach to image creation will soon be a requirement for emerging photographers.
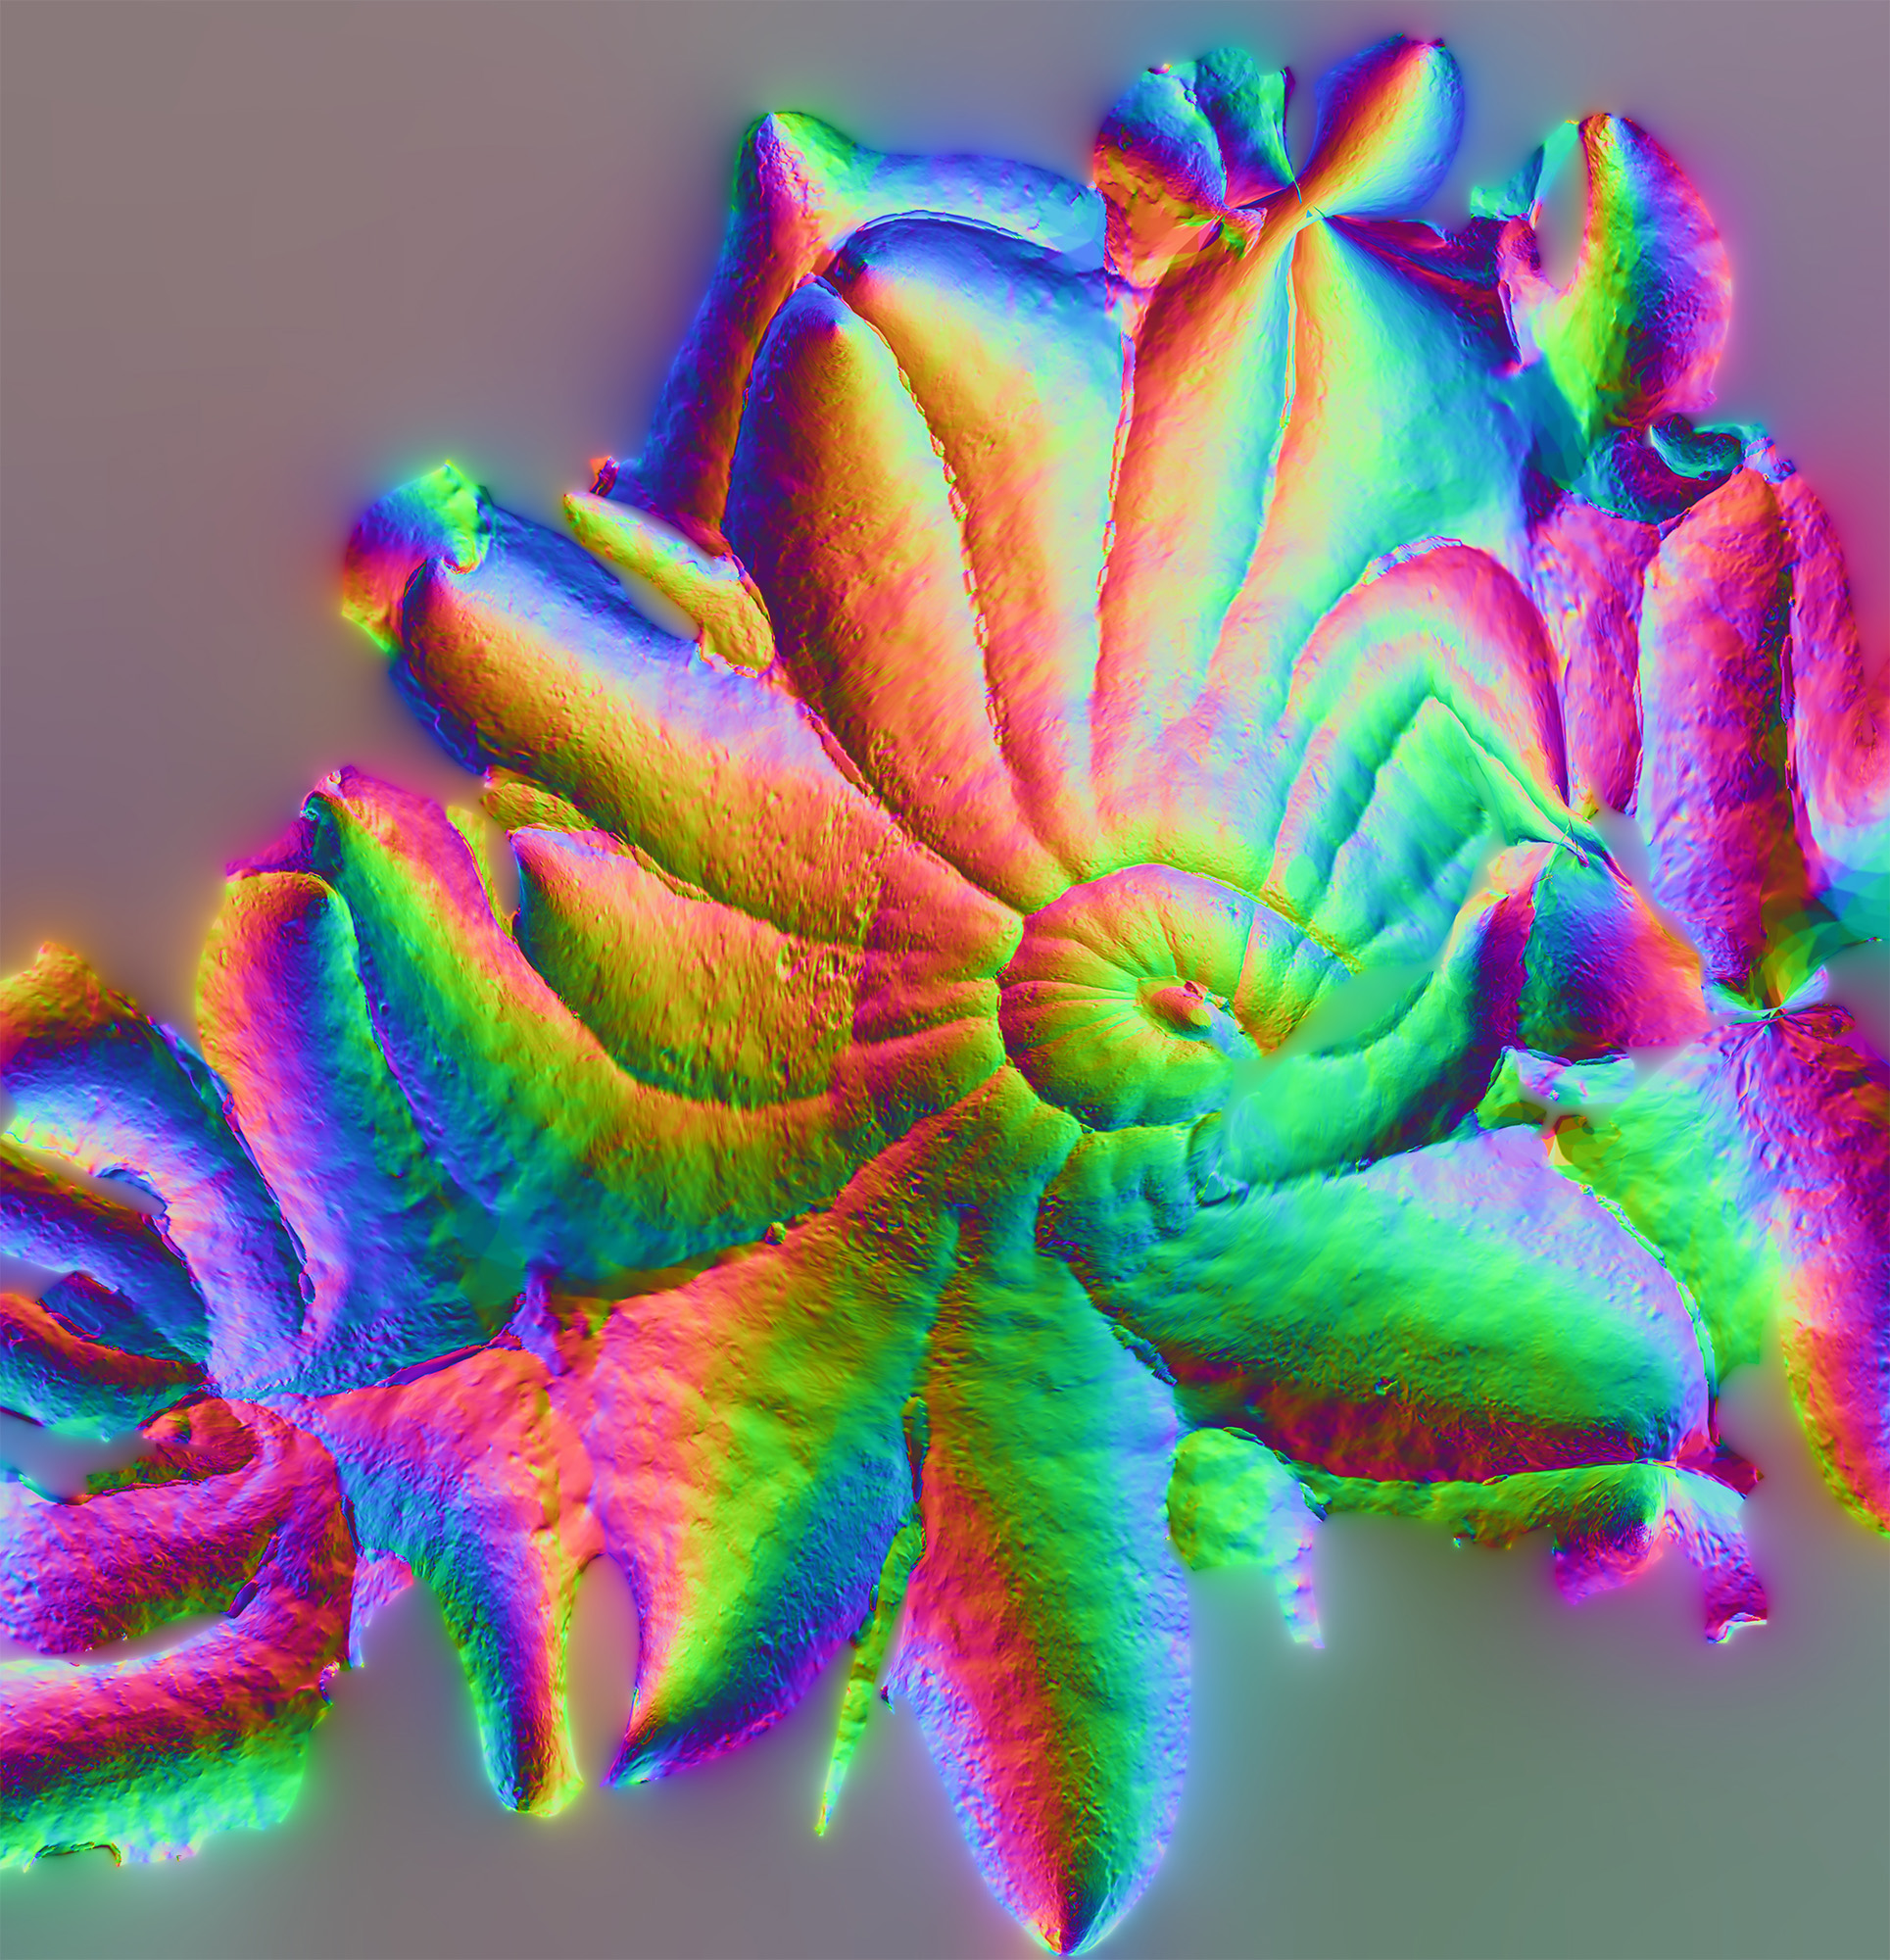
Every material applied to objects is a series of tiles, typically 4-8k square in resolution. To apply a texture to an object, it often needs to be “flattened” by creating a UV map. This bizarre image is a world space normal of a UV flattened Buddah’s Hand Fruit.
There’s an enormous amount of information to take in when learning 3D, but hopefully this will help you know where to begin when adding 3D to your image creation wheelhouse.
Discover all the latest features in Adobe"s beginner-friendly image-editing program. James Paterson takes us through the listDiscover all the latest features in Adobe"s beginner-friendly image-editing program. James Paterson takes us through the list
Always put yourself first. Obey your personal needs, desires, and “musts” in life before trying to help others: We all have inner-desires and “musts”. Yet, we often ignore our own personal needs in order to “put others above ourselves”. However, if you ignore
Poke around online, and you'll find thousands of Lightroom presets for sale, promising to give you the looks of famous photographers and styles. However, it's really not hard to create your own presets for free, and this helpful video will show you exactly how to do it.
The best way to market yourself is to create things of substance: Beyond Content Marketing In the past, the notion of “content marketing” was in vogue. The basic idea is this: The best way to market yourself is to produce great content (information and knowledge) in order to have the content be shared, in order […]
The post How to Edit Landscape and Nature Photos with the Lightroom Gradient Tool and Range Mask Features appeared first on Digital Photography School. It was authored by Simon Ringsmuth. Lightroom has always had a rich set of tools to allow photographers to get the most out of their images.
To live a better life, only pursue your “true preferences”. What are “true preferences”? A true preference is a preference you have in life, dictated by yourself. A “false” preference is a preference we falsely think we desire but in fact, we get suckered into thinking we prefer this. For example, True preference: Things you […]
You’ve covered your bases for that ever elusive amazing sunset shot: you’ve checked the time for sunset, mapped the exact location of the sun, and have composed a few frames so you know what to do when you get to the location. But what about the location itself?